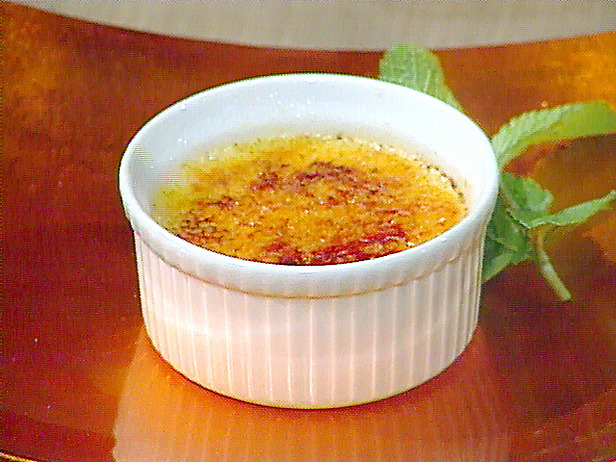
Come join me in my journey through the love of cooking, through difficult Creme Brulé's and easy peesy salads. Sharing my passion for cooking, great food...Let's bring the yummyness home.


Tuesday, August 7, 2012

Pumpkin Tart

As a lot of us knows -  Mom's food is always the best.  My mom is a wonder in the kitchen, I have always wanted to be able to cook like her.  Personally I think she would do great at Master chef as she can whip up something delicious out of almost no ingredients....truly amazing.  So when Hubby and I went to fetch our daughter after her visit with "Ouma" we got treated to a delicious Sunday meal...yummo.

One of the dishes my mom prepared was this pumpkin tart, it's so easy and absolutely yummy that I had to make it and share it with you.


Here we go:

Printable version

Ingredients

1kg uncooked Pumpkin
1 cup cream
1 cup sugar
1 cup flour
3 eggs
2 tbs baking powder
Extra sugar & cinnamon
50ml melted butter

Method

1.  Cook the pumpkin until it's soft.  I like melting about 3 tablespoons of butter and then adding about 4 tablespoons of sugar, when the sugar mixture starts boiling  I normally only then add the pumpkin.  Add some cinnamon for flavour.


2.  After the pmupkin has cooked and is soft, remove it from the stove, place it in a mixing bowl so that it can cool down.  After about 10 to 15 minute add the rest of your ingredients.  (Just a tip if the mixture is to runny then add a bit more flour - about 100ml or so will be fine)


3.  When the mixture is smooth and there are no flour lumps then pour it into a butter or sprayed oven dish.  Take the melted butter and slowly and evenly spread it across the tart.


4.  Now sprinkle a good amount of cinnamon and sugar over the tart spreading it evenly, and then place it into the oven at 180ºC for 45 minutes.


 Take it out and let it rest for about 10 seconds....hehehe only joking, give it a minute or two and then dish up and enjoy.  Taste like pudding with the great feeling that it's kinda healthy.

Enjoy


Tuesday, July 31, 2012

Biltong, Mushroom & White wine cream sauce pasta

LET'S COOK!!

I have been such a fan of Masterchef lately, watching every possible series of every possible country I could lay my hands on, with this my husband and I decided to do a Masterchef cook off with things we had in the house.  I decided to do a Biltong, Mushroom & White wine creams sauce pasta and he decided to make a Cheese, Garlic & Ginger filled Rump steak.  I personally think I won the challenge as his was great tasting but mine was just so much better....(hehehehe)


Now you don't necessarily have to use Biltong (South African Dried Spiced meat) you can use Bacon or even Panchetta, which ever you fancy, or leave out the meat completely for a vegetarian meal.  I added cashew nuts to the plate at the very end, and wow, it was a great feature....try it trust me.

It's really plain and simple to make.


So here we go:

Ingredients

Printable Version

250g of Biltong (Bacon, Panchetta or even chicken)
1 x Punnet of Mushrooms
1 x small onion - chopped
Butter
1 to 2 tubs of cream (373ml)
125ml to 200ml white wine (I used a sweet wine)
1/2 packet of spaghetti or any pasta you want to use
Cashew nuts (a handful)
Garlic
Herbs
Salt
Flour (to thicken the sauce)


How to:

  1. In a big pan melt the butter and then add your chopped onions in and saute until it's a nice golden brown.
  2. If your adding bacon or any other meat add it in now, and cook until they are nice and crispy.  if you are using Biltong only add it in later.
  3. Now to add the mushrooms, in this recipe I only halved them, it's a tasty way to eat fork-fulls of mushrooms...yum.  Don't let the mushrooms cook to long before continuing on with the saucy part of this recipe, we don't want the mushrooms to be soggy.
  4. Add your 1 or 2 tubs of cream, I love a lot of sauce so I added both tubs.  Keep stirring and then add your wine gradually.  Turn the heat down and keep mixing. 
  5. Add some garlic, herbs & a very little salt at this stage.  I sometimes scoop some of the sauce out into a small glass and then add 2 or 3 table spoons full of flour.  Mix the paste with your sauce and keep stirring. The reason why we add the flour outside of the pan is not to make any lumps.
  6. When your sauce is completely finished you can add the Biltong, that's if you are adding Biltong.  Now set the sauce aside.


  1. Boil the water for the pasta and add a about a tablespoon of salt to the water, when it's boiling add the pasta and let it cook.  The salt in the water make a huge difference to the taste of the pasta.  That is why we should had to much salt to our sauce.  And you should always cook your pasta at the end, so that they don't stick together.
And then you are ready to dish up, don't mix the two together rather dish them in the plate separately, add the cashew nuts and sprinkle a bit of  Parmesan cheese over to finish it off. 

Enjoy and let the taste move you.


Wednesday, July 18, 2012

Review: Jackies Eastern Kitchen


I LOVE SUSHI!!! 

I have absolutely fallen in love with sushi & Chinese food, no I don't think that's a strong enough statement.  I have become addicted to sushi.  I know there's lots and lots of people that just doesn't like sushi or even Chinese food and I used to be one of them about two years ago.  I owe my love for sushi to Jackies Eastern Kitchen, they are situated in 2851 Paradys St, Paradys Park Centre, Arauna, Brackenfell, Cape Town.  Now what's great about this little restaurant is the special that they have of R99 "Eat as much as you can", for that price you can eat as much sushi & Chinese food, from a selected menu, as you can handle.

About two years ago my husband took me out for dinner and we decided we were going to try some sushi and see what is all the fuss about.  I hated it (can you believe), didn't like the seaweed taste etc...but then a couple of months later we went out for dinner with our best friends to Jackies Eastern Kitchen and wow oh wow...I fell in love with this restaurant and with the great sushi & Chinese food. 

I of course started it safe, with some sweet & sour pork and their Crispy pork which is to die for.  I then tried the Deep Fried California rolls and I was hooked.  They were full of flavour, crunchy on the outside and dipped into Soya sauce, one of the best meals I have ever enjoyed in my life.  

Below is a picture I took, at the top left hand corner is their Crispy Pork, then as we come down, right here at the bottom of the picture is my favourite Cashew Nut Chicken, the flavours are really amazing and food is freshly made.  In the middle you'll see my all time best Deep Fried California rolls with bits of sweet chili sauce and mayo.  Since we usually make use of the special the photo's show the plates that you receive which are not the full portion plates, they are smaller portion, which is great, so you can order any amount of times you want and you can try many different items.


As you can see they have a wide variety to choose from, from Tempura Prawns California rolls to Philli California rolls.  They can even do your selection with rice paper and not seaweed.


I've even had the Vegetarian California rolls, such a clean taste, almost like a pallet cleanser.


I would absolutely recommend anyone to go and eat at this restaurant, their food is absolutely fabulous, where they sometime loose a couple of points is the fact that they are always busy (if that's such a bad thing), but that would mean that food could take some time to come out of the kitchen.  I would suggest if you are in the area BOOK a table, we always book, since they have become so popular you might just wait for a table.

Jackies Eastern Kitchen gets 4 Sushi stars out of 5


Disclaimer: No one was paid to write a review about this dinner and the opinions expressed in this post are voluntary and mine entirely. 

Wednesday, February 22, 2012

Roasted Leg of Lamb & Veggies

So lately i've been on a healthy eating plan, so it's been a bit hard to make dishes that I could blog.  So as a treat I made us a Leg of Lamb for our Sunday lunch.  Wow if I must say so myself, it's always a winner and so easy to make.  It can be so full of flavour and so moist and delisious. 

Life is really about flavours and tastes, be it that you love the aroma's of herbs & spices like me, or like my husbands that loves, and I mean loves the "burn" of a chillie.  We should always try and make the aroma's fill our kichens when we cook....as an invite to the world to say....hey something awesome is happen in this house.

When I made the leg of lamb I added some roasted veggies, brown rice and peas to as additionals, and you wouldn't think it but this meal was totally on my "diet" plan as approved. 

Go on pour yourself a glass of wine put that roast in the oven and relax.

Here we go:

1x Leg of lamb
4/5 medium sized potatoes
1 x packet of button mushrooms
1x packet of brown onion soup
1 x small to medium onion (chopped)
Rosemary & Garlic(dried or fresh)
100ml x Red wine (just for that extra flavour)
Soya sauce
Beef spice

Oven to be on 180º C


1.  Place your leg of lamb on top of the chopped onion, and pour your red wine in over the meat, this will as the lamb cooks draw into it.  Also add your spices now, except for the  rosemary and garlic. Then place into the oven at 180º C

After placing the lamb in the oven for about 20 minutes on 180º C, then take it out of the oven and make some cuts in the top layer of the "fatty part".  I love to take rosemary and garlic mix it with butter or margarien and then put some of the mixture in the cuts that i've made, the flavours gets pulled in to the meat and gives it that wow factor.


 2.  Then before you place it back into the oven cut up your potatoes in ¼ put them in with the lamb, also add your mushrooms, I kept them whole.  Now sprinkle the packet of brown onion soup all over....this will give the meat and everything else a nice flavour and also thicken the "sauce". 
Place it back in the oven, I kept it for about 2 hours in the oven, the meat was reall falling of the bone, and that's how I like it.  I then took it out of the oven and cut if up in equal slices.  Leave it a bit in the "sauce" and then you are ready to dish up. 


3.  For the roasting of the veggies I used sweet potato and butternut, I cut them up into very small blocks and drizzled a bit of oil at the bottom of a oven pan, and then sprinkled some of Knor's Veggie Bake over....Oh my word what a suprise on how nice it came out. 

Now if you don't have or can't find Knor's packet....make your own flavour, add some green, red & yellow peppers, add some rosemary, salt and then you should have such a nice mix of flavours.  Place it into the oven until they are cooked or nice and soft.


Enjoy and let the tastes

Thursday, February 16, 2012

Heavenly Creme Brulee

Have you ever eaten something so delictable, so amazing that you had to have more..well some time ago we went out for a dinner & a show, for dessert I ordered the Creme Brule...and my world has been changed from then on...

My mission life now is to make the perfect Creme Brulee...and of course now to share it with you.  I'm still struggling a bit with the topping to get it perfectly smooth, i have tried a couple of different ways but it is just not coming out the way I want it to, but we will keep trying.


I have also tried a couple of different recipes, since the one recipe comes out very soft, but the taste is awesome, and the other recipe comes out to eggy...again trial and error...

Here is some pics of the process for those of you that want to see a work in progress, I must also admit, Creme Brulee is not as difficult as everyone says it is:

I don't have any ramekins so i used some white cups, they worked perfectly to, and also your guests can hold the dessert with the handle:

Fill a large roasting tin (the ones that usually come with your oven) halfway with boiling water. Place the ramekins into the roasting tin


Mix the egg, yolks and half the sugar together in a bowl.

Place the cream, milk, vanilla pod and the remaining sugar into a saucepan and bring to the boil. (If you like the black seeds in the creme brulee, split the vanilla pod down its lenth first) if you don't have a vanilla pod then use vanilla esscense.

Strain the boiling mixture into the egg mixture and whisk well.


Fill the rammikins and cook for 45 minutes.


Remove them from the oven and allow to cool, thenplace in the fridge.

Just before you serve the, sprinkle the tops with sugar and caremalise with a blowtorch. if you don’t have a blowtorch, put the oven on grill and plave them under the grill until caremalised. (Its very quick so watch them)


Serve immediately with a few strawberries or other fruit and dust with some castor sugar.


Let the flavour take you away....
Here is the recipe:

Crème brulee
What you need
375ml cream(1 tub)
125ml milk
75ml sugar
4 egg yolks
1 whole egg
1 vanilla pod
4 ramekins

The process

Heat the oven to 120 Celsius (very important to get this right)
Mix the egg, yolks and half the sugar together in a bowl.
Place the cream, milk, vanilla pod and the remaining sugar into a saucepan and bring to the boil. (If you like the black seeds in the crème brulee, split the vanilla pod down its length first)
Strain the boiling mixture into the egg mixture and whisk well.
Fill the ramekins and place them in a roasting pan with enough water to reach half way up the sides of the ramekins and cook for 45 minutes.
Remove them from the oven and allow to cool, then place in the fridge.
Just before you serve the, sprinkle the tops with sugar and caramelize with a blowtorch. if you don’t have a blowtorch, put the oven on grill and place them under the grill until caramelized. (Its very quick so watch them)
Serve immediately with a few strawberries or other fruit and dust with some castor sugar